Prasyarat
- Proxmox terinstall
Panduan
-
Buat token untuk proxmox-expoter
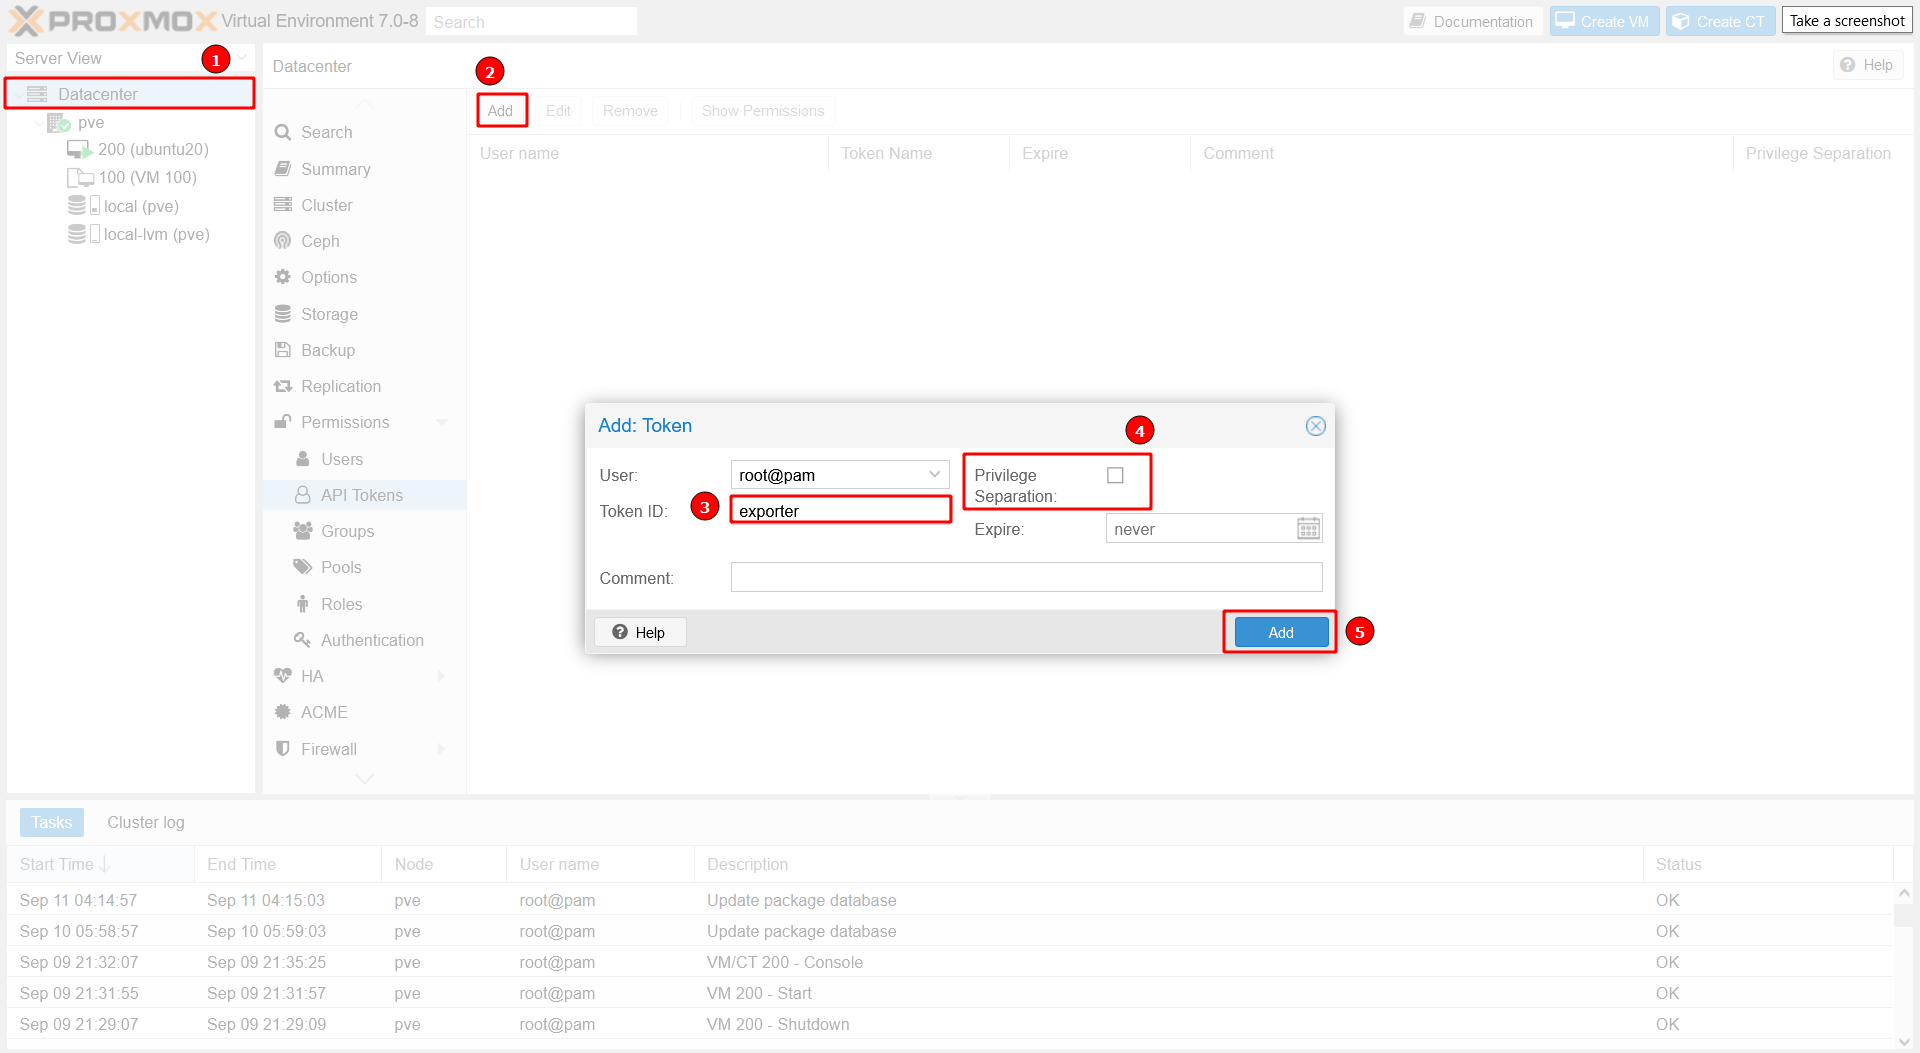
- Buat API Token
- Datacenter > API Token
- Klik Add
- Masukan Token ID (Catat bagian ini)
- Hapus centang pada Privilege Separation
- Klik Add

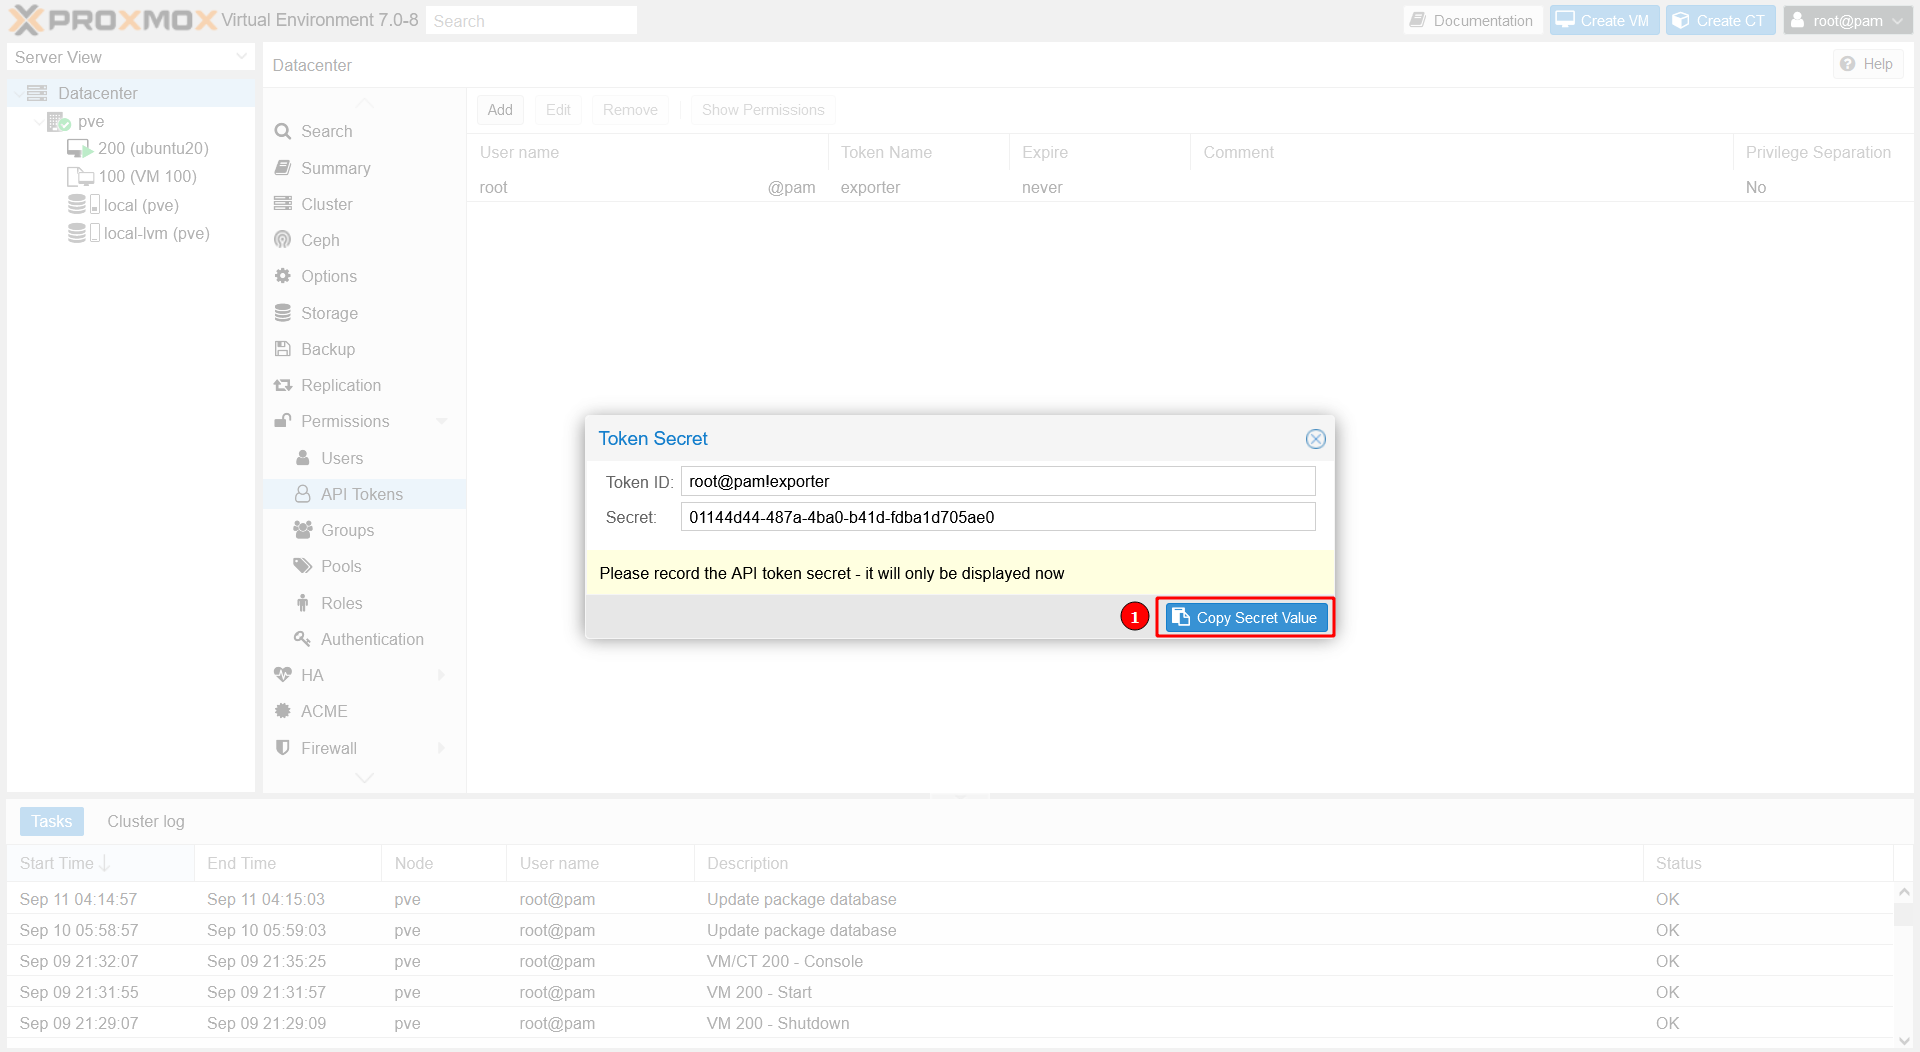
- Salin Token Secret
- Klik “Copy Secret Value” (Catat bagian ini)

- Klik “Copy Secret Value” (Catat bagian ini)
- Buat API Token
-
Pasang
proxmox-exporter
python3 -m pip install prometheus-pve-exporter
-
Buat servis systemd
- Buat user
pve_exporter
useradd --no-create-home --shell /bin/false pve_exporter- Buat file konfigurasi
mkdir /etc/pve_exporter cat<<EOF > /etc/pve_exporter/config.yaml default: user: root@pam token_name: exporter # Token ID (Langkah 1 > Buat API Token) token_value: 01144d44-487a-4ba0-b41d-fdba1d705ae0 # Secret Token (Langkah 1 > Salin Token Secret) verify_ssl: false EOF- Buat file environment
cat<<EOF > /etc/default/pve_exporter CONFIG_FILE=/etc/pve_exporter/config.yaml LISTEN_ADDR=192.168.10.254 LISTEN_PORT=9221 EOF- Buat file systemd
cat<<EOF > /etc/systemd/system/pve_exporter.service [Unit] Description=PVE Expoter Wants=network-online.target After=network-online.target [Service] User=pve_exporter Group=pve_exporter Type=simple EnvironmentFile=/etc/default/pve_exporter ExecStart=pve_exporter \$CONFIG_FILE \$LISTEN_PORT \$LISTEN_ADDR [Install] WantedBy=multi-user.target EOF- Reload daemon dan jalankan servis
systemctl daemon-reload systemctl enable --now pve_exporter - Buat user
-
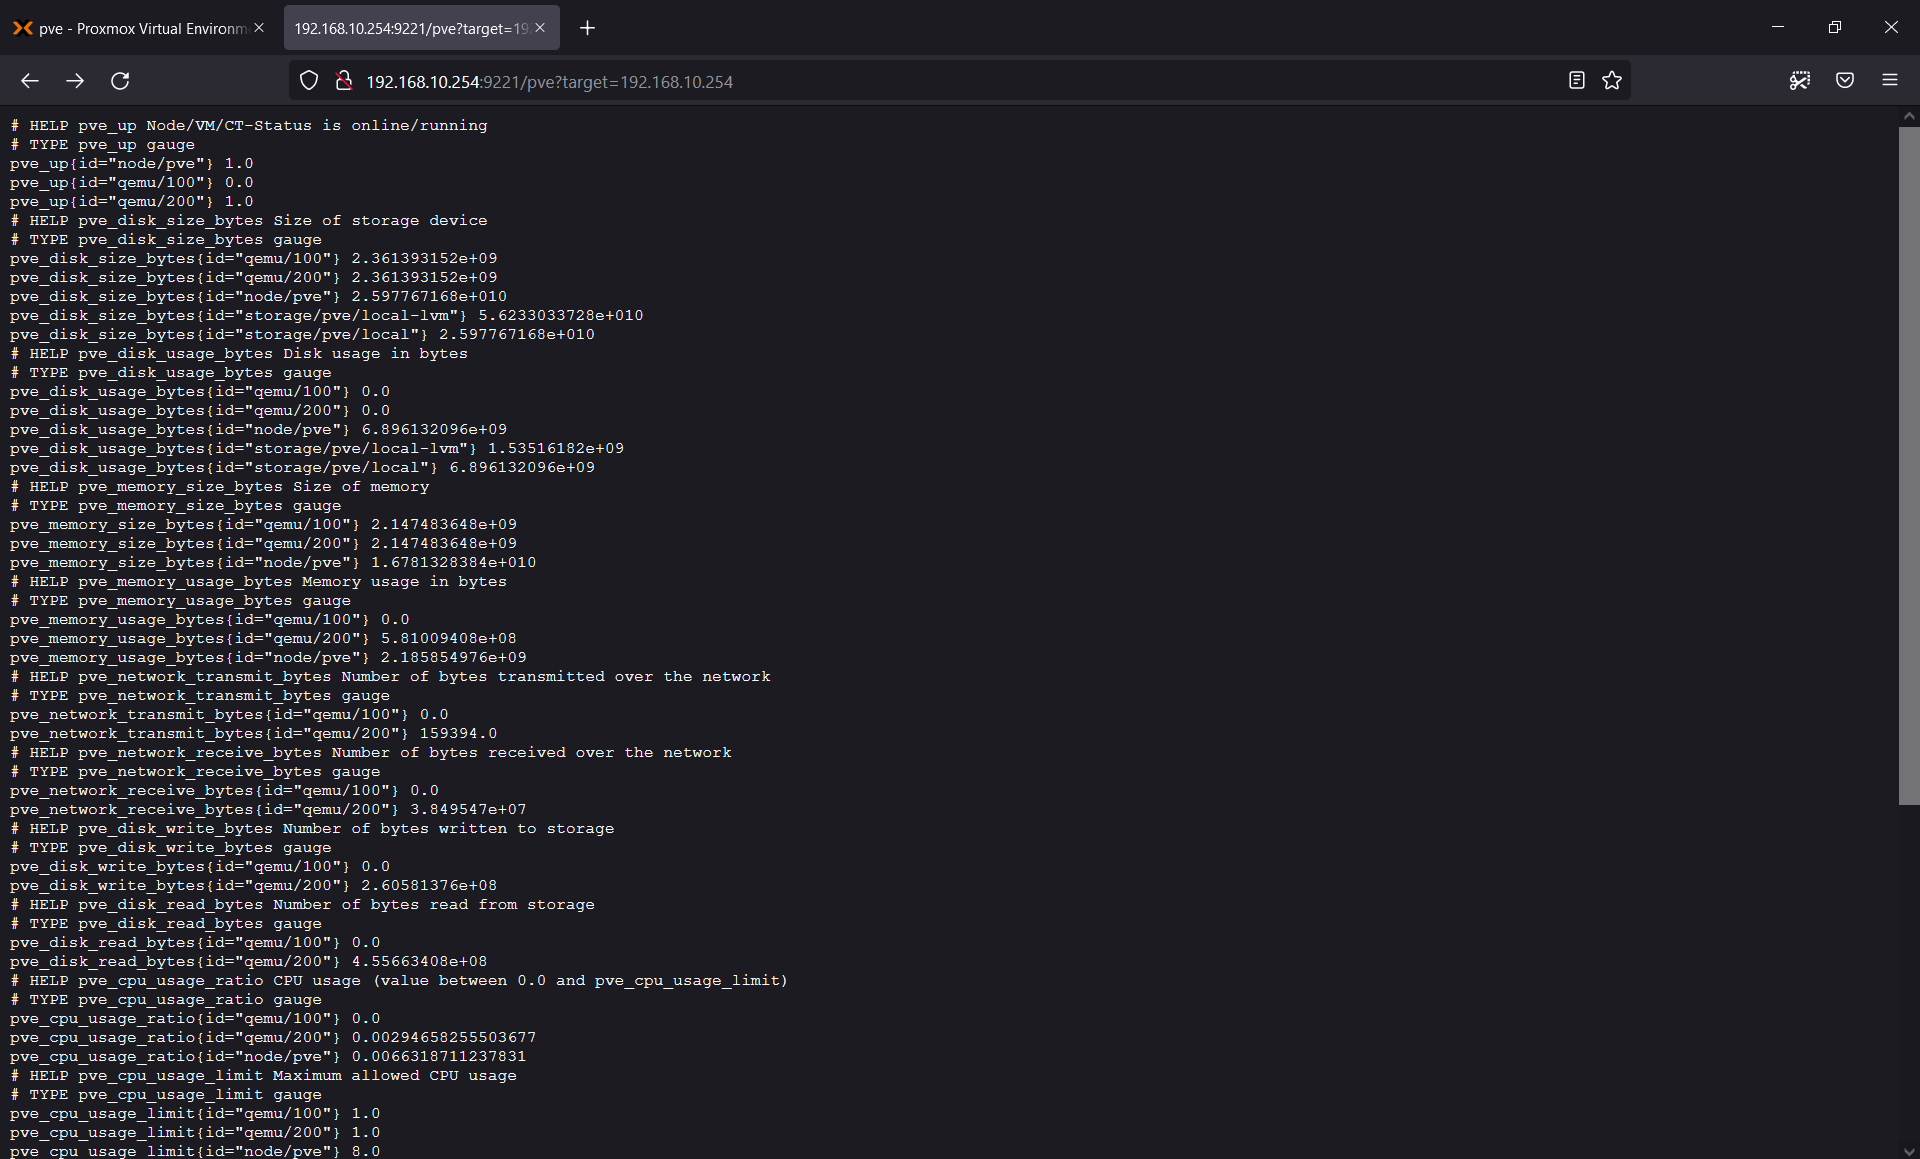
Verifikasi dengan membuka
http://<ip_exporter>:9221/pve?target=<ip_node_pve>
Catatan!
Menambahkan job pada konfigurasi prometheus
  - job_name: 'pve_exporter'
    static_configs:
      - targets:
        - 192.168.10.86  # Proxmox VE node.
        - 192.168.10.87  # Proxmox VE node.
        - 192.168.10.88  # Proxmox VE node.
    metrics_path: /pve
    params:
      module: [default]
    relabel_configs:
      - source_labels: [__address__]
        target_label: __param_target
      - source_labels: [__param_target]
        target_label: instance
      - target_label: __address__